PVE issues
- pve添加
NFS报错:create storage failed: mkdir /mnt/pve/NAS_share/snippets: Permission denied at /usr/share/perl5/PVE/Storage/Plugin.pm line 1374. (500)
解决方法:
I've self-resolved! In FreeNAS, under the share settings, I experimentally set the mapall users setting to root, which makes anyone using that directory access it with root permissions. The issue then went away, giving me full access to the share. To further lock down the security, I created a "Proxmox" user with write permissions, and mapall-users'd that user to the share. Issue resolved!
来自:https://forum.proxmox.com/threads/cant-use-nfs-share.53463/
简单来说就是TrueNAS里面的共享设置不对,具体指定步骤为:
编辑NFS共享,打开高级选项
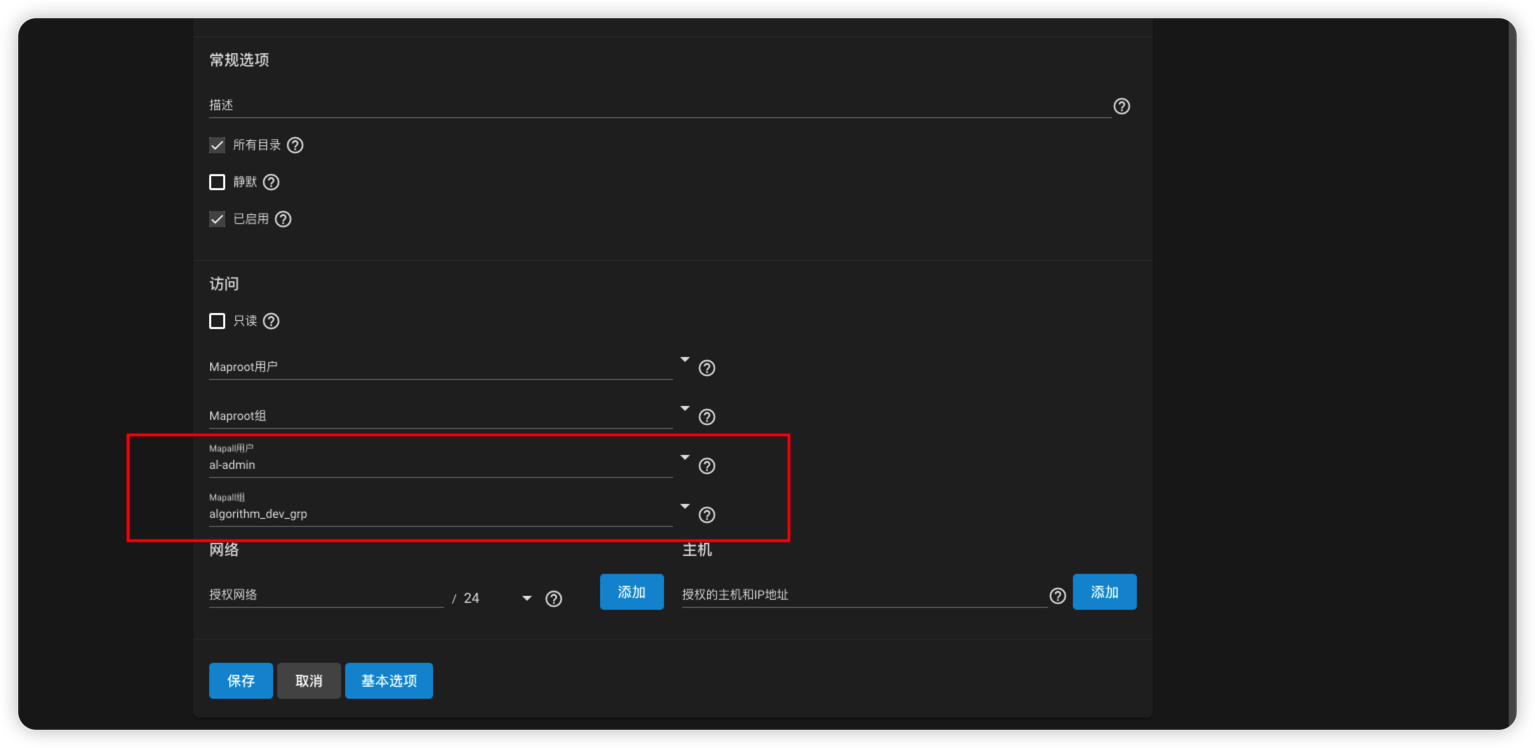
不要设置为root用户或者root用户组。
- 安装rockylinux报内核错误,如下图所示:
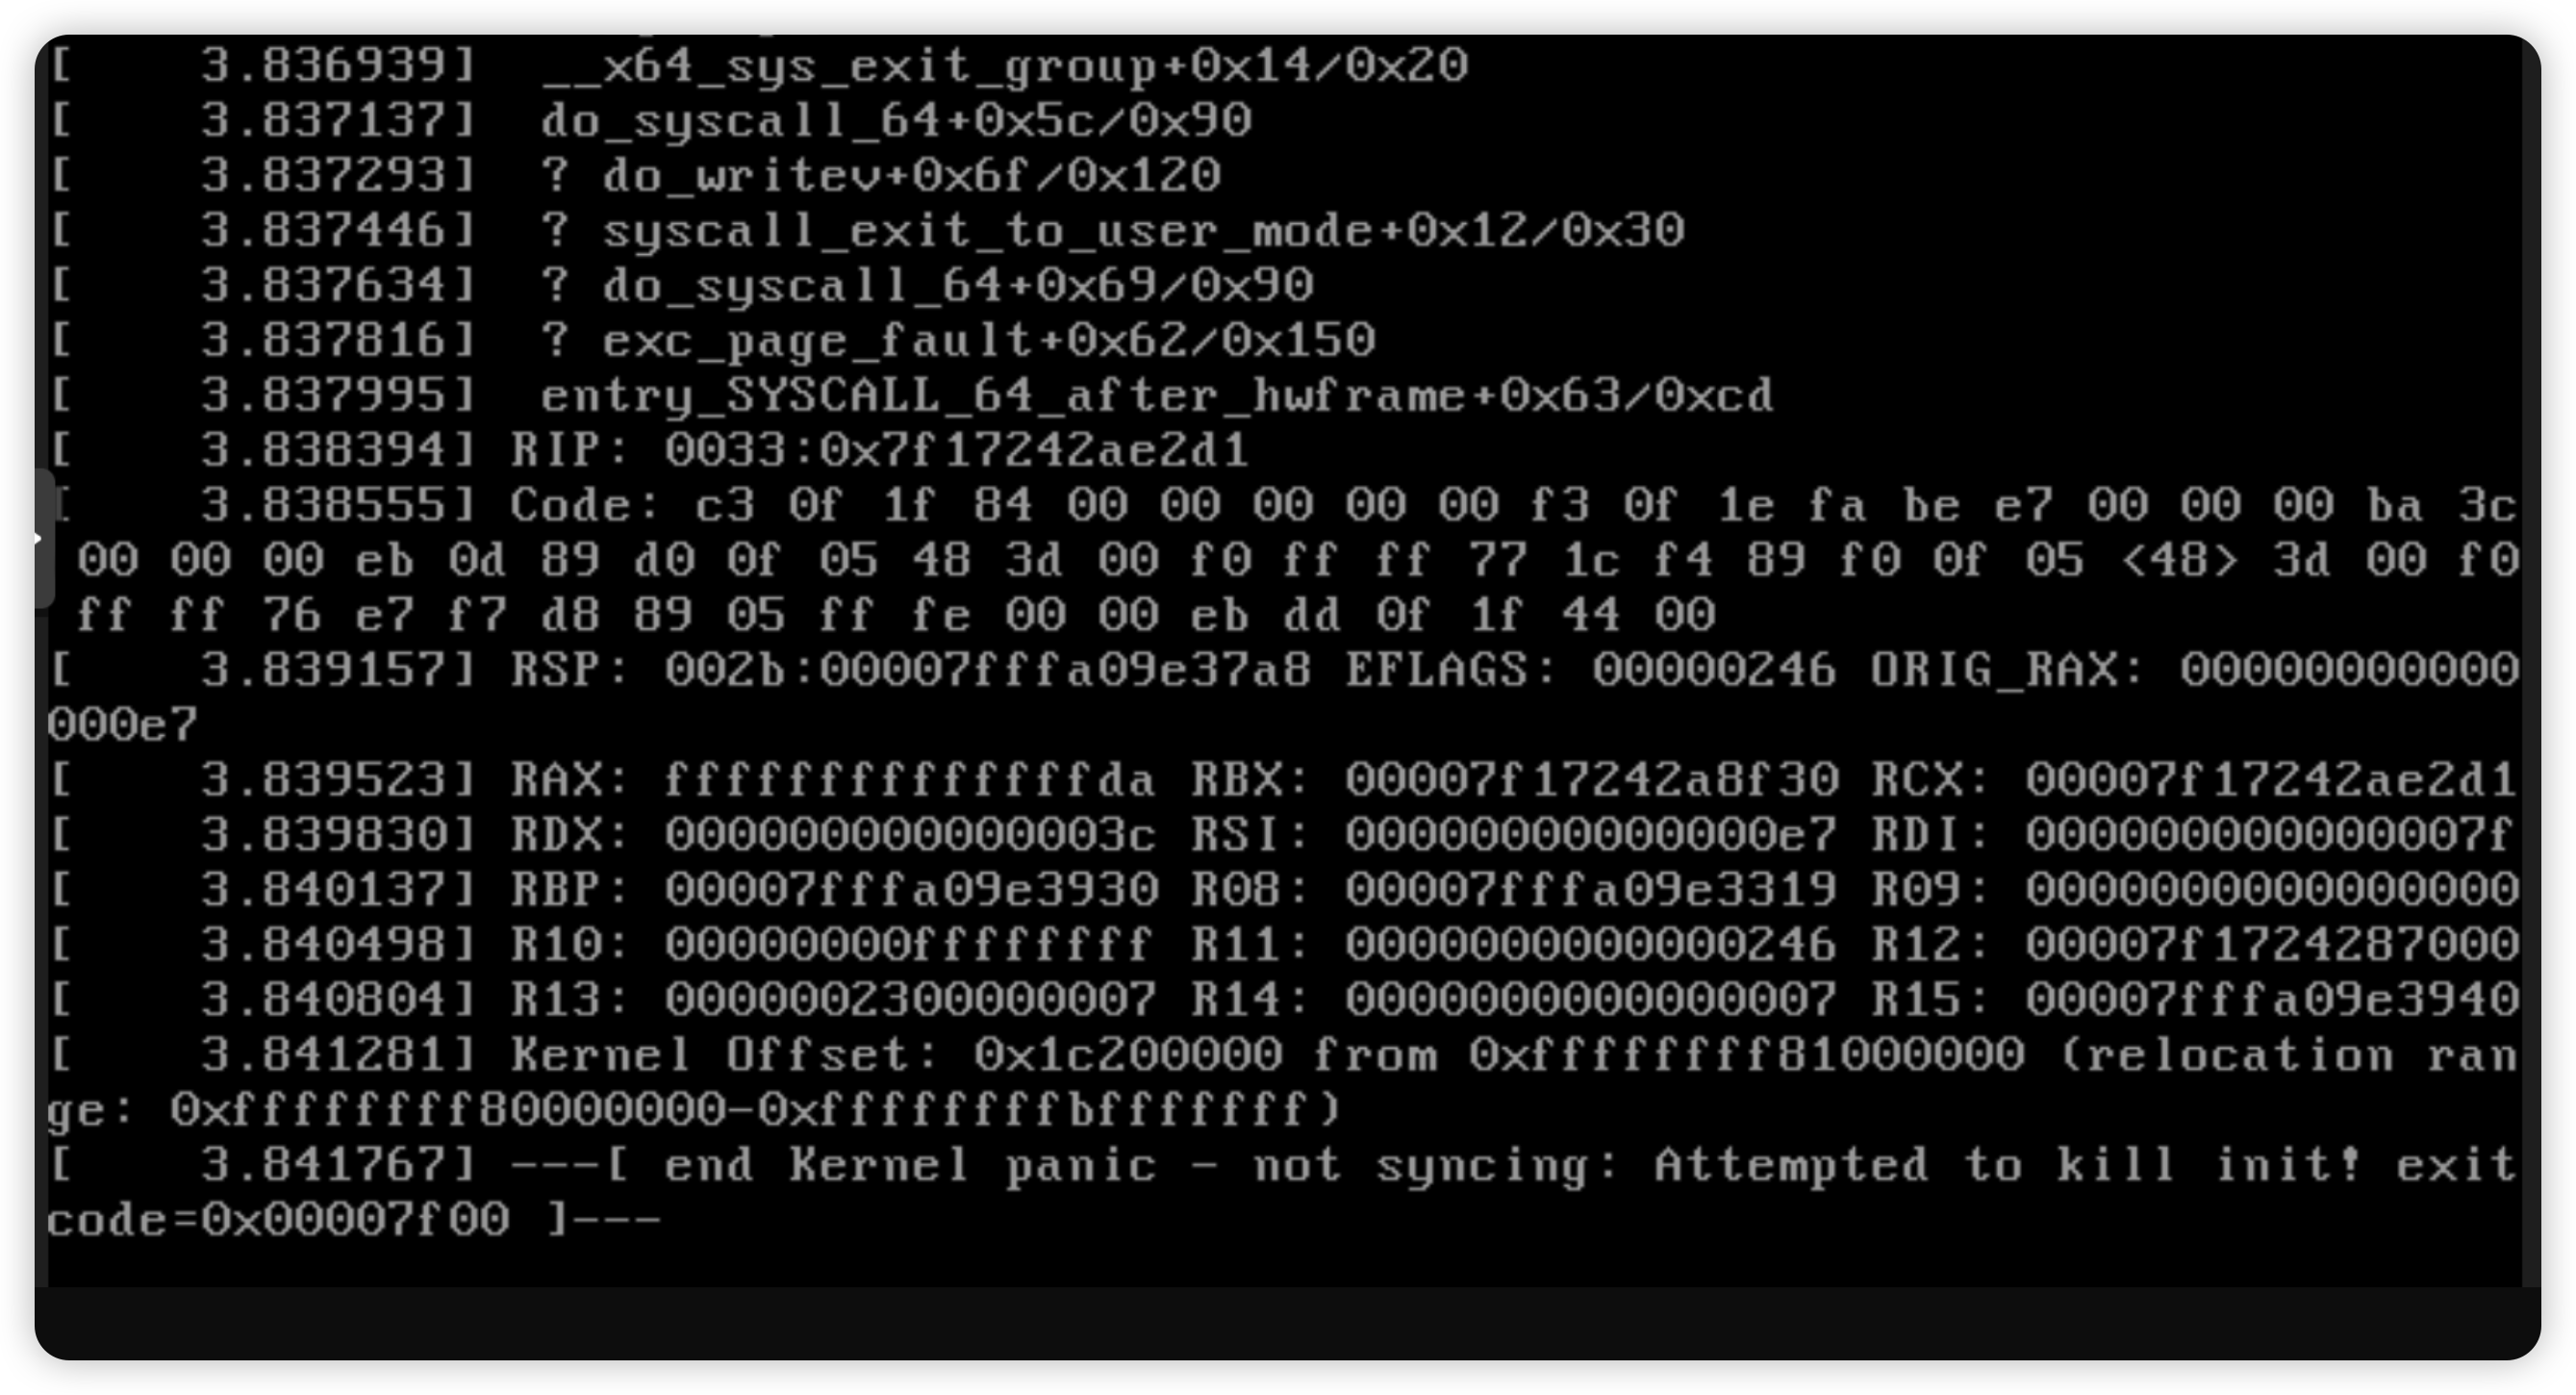
解决方法:
Try with CPU-type:
host: https://forum.proxmox.com/threads/k...centos-9-stream-iso.104656/page-2#post-485684
- 修改vmid,使用以下脚本:
#!/bin/bash

echo Put the VMID to change
read oldVMID
case $oldVMID in
    ''|*[!0-9]*)
        echo bad input. Exiting
        exit;;
    *)
        echo Old VMID - $oldVMID ;;
esac
echo
echo Put the new VMID
read newVMID
case $newVMID in
    ''|*[!0-9]*)
        echo bad input. Exiting
        exit;;
    *)
        echo New VMID - $newVMID ;;
esac
echo

vgNAME="$(lvs --noheadings -o lv_name,vg_name | grep $oldVMID | awk -F ' ' '{print $2}' | uniq -d)"

case $vgNAME in
    "")
        echo Machine not in Volume Group. Exiting
        exit;;
    *)
        echo Volume Group - $vgNAME ;;
esac

for i in $(lvs -a|grep $vgNAME | awk '{print $1}' | grep $oldVMID);
do lvrename $vgNAME/vm-$oldVMID-disk-$(echo $i | awk '{print substr($0,length,1)}') vm-$newVMID-disk-$(echo $i | awk '{print substr($0,length,1)}');
done;
sed -i "s/$oldVMID/$newVMID/g" /etc/pve/qemu-server/$oldVMID.conf;
mv /etc/pve/qemu-server/$oldVMID.conf /etc/pve/qemu-server/$newVMID.conf;

echo Ta-Da!
或者手动:
- First, we have to take a backup of the virtual machine and its configuration.
- Next, run the command below to access information about the logical volumes:
`lvs -a`
- Now, from the output from the above step, select the VMID that we want to change.
- Then, shut down the VM.
- After that, run the following command to update the name of the volumes:
lvrename data/current_vmid new_vmid`


Remember to replace current_vmid and new_vmid with the current VMID and the new VMID we want to change it to respectively.
- Next, we have to update the ID in the VMs configuration file as seen below:
`sed -i "s/ current_vmid/new_vmid/g" /etc/pve/bob-server/ current_vmid.conf`
- Then, we will rename the VM configuration file as seen here:
`mv /etc/pve/bob-server/ current_vmid.conf /etc/pve/bob-server/new_vmid .conf`
- Finally, it is time to start the VM again.
- pve克隆完之后莫名奇妙所有主机和存储图标全部变成问号了?
解决方案:
service pve-cluster stop
service corosync stop
service pvestatd stop
service pveproxy stop
service pvedaemon stop

service pve-cluster start
service corosync start
service pvestatd start
service pveproxy start
service pvedaemon start
Tried this before, but now it actually worked. Got one node up and working, testing it on 2nd node now...
- 命令行终端移除页面无法删除的卷组
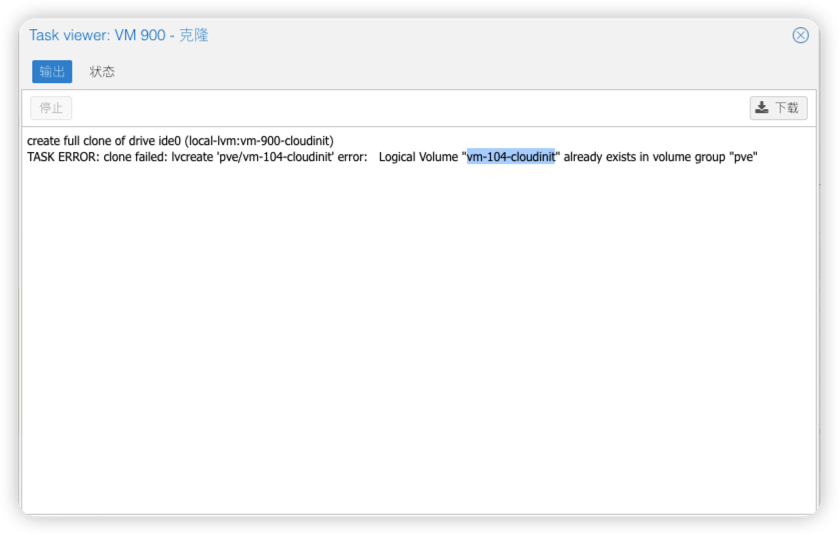
⚠️注意如果是重要数据,需要备份。
run
Code:
lvdisplay
- Check to see if you have nay volume's still in that group
If you do run
Code:
lvremove /dev/pve/vm-104-cloudinit- This will remove that volume